Fly screens are a convenient tool for keeping your home well-ventilated while keeping bugs at bay. However, there comes a time when these screens need to be removed, whether for cleaning, maintenance, or replacement. Proper removal of these screens will ensure that you don't damage the screen or the window frame.
In this guide, we'll cover everything you need to know about how to remove a fly screen from a window, including the tools you'll need, a step-by-step breakdown for different screen types, and solutions to common challenges.
Tools Needed for Screen Removal
Before getting started, you’ll need to have the right tools on hand to make the process as smooth as possible. Depending on the type of screen you're dealing with, you may need different tools for safe and efficient removal.
Common Tools for Removing Window Screens
Here are some basic tools that can assist you in the removal of most window screens:
- Flathead Screwdriver: One of the most versatile tools for removing fly screens. It can be used to pry up the corners or loosen screws holding the screen in place.
- Gloves: Wearing gloves while removing a screen will protect your hands from sharp edges and give you a better grip.
- Pliers: These are handy for grabbing and pulling out stubborn clips or fasteners that secure the screen frame.
Optional Equipment for Easier Removal
While the basic tools listed above will get the job done, these are a few additional tools that can make the process easier:
- Magnetic Screwdriver: Useful for removing and holding onto tiny screws that may otherwise fall and get lost.
- Utility Knife: If you encounter a screen with old caulking or sealant around the edges, a utility knife can help cut through this material cleanly.
- Rubber Mallet: For screens that are tightly fitted, a rubber mallet can help gently tap the frame without causing damage.
Step-by-Step Guide to Removing Different Types of Screens
Not all fly screens are the same. Depending on whether you have retractable screens, fixed frame screens, or blockout screens, the removal process can vary. Below are detailed instructions for each type.
How to Remove Retractable Window Screens
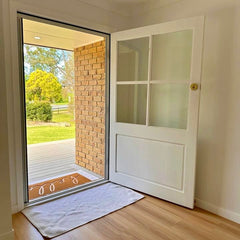
Retractable screens are popular for their convenience, as they can be easily rolled up when not in use. Here's how to remove them:
- Roll up the screen: Start by retracting the screen into its housing, which will make removal easier.
- Locate the mounting screws: Look for screws that hold the retractable screen housing to the window frame. These are usually found along the top or sides.
- Unscrew the housing: Using a screwdriver, carefully remove the screws and set them aside. Make sure to support the housing as you do this to prevent it from falling.
- Detach the screen housing: Gently pull the screen housing away from the window frame. If it's stuck, a flathead screwdriver can be used to carefully pry it loose.
How to Remove Fixed Frame Screens
Fixed frame screens are more rigid and often require a bit more effort to remove. Follow these steps:
- Identify the type of fasteners: Fixed screens are typically held in place by clips, screws, or a tension system. Examine the corners of the screen to see what you're dealing with.
- Release the clips or screws: If your screen has clips, use a flathead screwdriver to pry them loose. For screws, use the appropriate screwdriver to remove them.
- Remove the screen: Once the fasteners are released, gently push the screen out of the frame from the inside. Be careful to avoid bending the frame.
- Check for any additional fasteners: Some screens may have extra fasteners hidden along the sides, so double-check before pulling the screen out completely.
Removing Blockout Screens
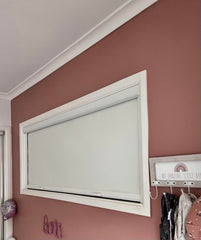
Blockout screens are designed to block out more light and heat, and they can be a bit trickier to remove due to their heavier material and tighter fit. Here's how:
- Check for a sealed edge: Blockout screens often have a sealed edge or gasket. If this is the case, use a utility knife to carefully cut through the seal.
- Remove the clips or screws: Unscrew or unclip any fasteners holding the screen in place.
- Gently pull the screen from the frame: Once the fasteners are removed, carefully lift the screen out of the window frame. Take your time, as blockout screens can be heavy and awkward to maneuver.
Common Challenges and How to Solve Them
Even with the right tools, you may encounter a few obstacles while removing your fly screen. Below are some common issues and tips on how to address them.
Screens Stuck in Place
If the screen seems stuck, it could be due to dirt, rust, or tight fasteners. In this situation, insert a flathead screwdriver into the edge of the frame and gently pry it up. Be careful not to apply too much force, as this can bend the frame. If prying doesn't work, gently tap the frame with a rubber mallet to loosen it.
Dealing with Tight or Rusty Screws
Old or rusty screws can make screen removal frustrating. To deal with this, you can spray a rust-penetrating lubricant (such as WD-40) on the screws and wait a few minutes before attempting to remove them. Or, if the screw head is too worn or rusty to use a screwdriver, pliers can help get a better grip on the screw to twist it out.
Maintenance Tips After Screen Removal
After successfully removing your fly screen, it's a good idea to clean and inspect it before putting it back in place.
Cleaning the Screen Frame and Mesh
The screen frame and mesh can accumulate dirt and debris over time. Here's how to clean them:
- Use mild soap and water: For metal or fibreglass screens, use a soft brush with mild soap and water to scrub the mesh and frame gently.
- Avoid harsh chemicals: Harsh chemicals can damage certain screen materials, so stick to mild cleaning solutions.
- Rinse and dry: Rinse the screen with clean water and let it air dry completely before reinstalling.
Inspecting for Damage Before Reinstalling
Before reinstalling the screen, inspect it for any damage that might need attention. Look for any tears, holes, or fraying in the mesh. Minor holes can be patched with a screen repair kit, but larger damage may require a full replacement. You’ll also want to make sure the frame is still in good shape. If it’s bent or warped, it might not sit properly in the window anymore, and you may need a replacement.
Safety Precautions During Screen Removal
While removing a fly screen may seem like a simple task, there are a few safety precautions to keep in mind:
- Wear gloves: Sharp edges on the screen or window frame can cut your hands. Always wear gloves for protection.
- Be mindful of height: If you're removing a screen from an upper floor or elevated window, take extra care to prevent accidents. Use a stable ladder or step stool if necessary.
- Handle the screen carefully: Avoid applying too much force when removing or handling the screen, as this can cause damage or injury.
FAQs About Screen Removal
Can I remove the screen without tools?
In some cases, yes. If your screen uses clips or tension springs, you may be able to remove the fly screen by hand. However, for screens secured with screws or tight fasteners, tools like a screwdriver will likely be necessary.
What to do if my screen is damaged?
If your screen is damaged, you can repair small tears using a screen repair kit available at most hardware stores. For more extensive damage, consider replacing the screen entirely to ensure it functions properly.
How do I avoid damaging the screen during removal?
To avoid damaging the screen, take your time and use the right tools. Gently pry up corners with a flathead screwdriver, and avoid forcing the screen out of the frame. Wearing gloves can also prevent accidental damage.
Can I remove a screen without removing the entire window?
Yes, in most cases, you can remove the screen without touching the window itself. Screens are typically designed to be removable without needing to uninstall the window frame.
What should I do if the screen doesn’t fit back properly?
If your screen doesn’t fit back properly, check if the frame is bent or misaligned. Ensure that no clips or screws were accidentally misplaced or bent during removal. Try adjusting the screen gently to reposition it. If the problem persists, it might be time to get the screen replaced or professionally realigned.
Remove A Fly Screen with Ease
Removing a fly screen is a simple DIY task. With the right tools, you can safely take down retractable, fixed frame, or blockout screens. Just follow the steps, clean and inspect your screen, and it’ll be ready to go back up. For more advice on how to remove a fly screen, contact Ezy Screens today!


